The awesome stuff Leon

Micro8ks and Smartos

"Autonomous low-ops Kubernetes for clusters, workstations, edge and IoT"

Microk8s is a simple way to launch single node kubernetes environment for local development and/or testing and learning purposes for devops. It is a fast, small, cheap k8s for CI/CD.

Minikube is a similair tool to get a kubernetes up and running locally, but with one big difference, MiniKube spins up a VM and runs it in the VM. Microk8s doesn't need a VM, which means you get a lot more resources at your disposal. VM's are pretty heavy on a laptop.

So it sounds good to me :D Let's play with it on my smartos server.

1: Creating a KVM Ubuntu instance

First you need a KVM running with Ubuntu, I used the following setup, create a file k8s-micro.json:

{
  "brand": "bhyve",
  "alias": "bionic-k8-master",
  "ram": "2048",
  "vcpus": "2",
  "resolvers": [
    "8.8.8.8"
  ],
  "nics": [
    {
      "nic_tag": "admin",
      "gateway": "192.168.1.1",
      "netmask": "255.255.255.0",
      "ip": "192.168.1.100",
      "model": "virtio",
      "primary": true
    }
  ],
  "disks": [
    {
      "image_uuid": "c9db249c-93ba-4507-9fa4-b4d0f81265fc",
      "boot": true,
      "model": "virtio"
    }
  ],
  "customer_metadata": {
    "root_authorized_keys": "ssh-rsa INSERTKEYHERE somebody@askme",
    "cloud-init:user-data": "#cloud-config\n\nresolv_conf:\n  nameservers: ['8.8.8.8']\n\nruncmd:\n - curl -s \"https://packages.cloud.google.com/apt/doc/apt-key.gpg\" | apt-key add -\n - echo 'deb http://apt.kubernetes.io/ kubernetes-xenial main' >/etc/apt/sources.list.d/kubernetes.list\n - apt-get update\n - apt-get upgrade -y\n - apt-get install -y docker.io\n - systemctl enable docker\n - systemctl start docker\n - echo 'net.bridge.bridge-nf-call-iptables=1' >>/etc/sysctl.conf\n - sysctl -p\n - swapoff -a\n"
  }
}

I have to be honest and explain to you, my default install will automatically install docker with cloud-init.
Lets install it: vmadm install k8s-micro.json

2: Install micro8ks

Login into your new vm and install with snap (current version is 1.18):

# sudo snap install microk8s --classic --channel=1.18/stable
2020-05-19T14:58:03Z INFO Waiting for restart...
microk8s (1.18/stable) v1.18.2 from Canonical✓ installed

Make sure that the user can access the micro8ks without needing to do sudo, my user is ubuntu:

# sudo usermod -a -G microk8s ubuntu
# sudo chown -f -R ubuntu ~/.kube

To make it work, after the commands you need to logout and login again.

3: Checking the status

# microk8s status --wait-ready
microk8s is running
addons:
cilium: disabled
dashboard: disabled
dns: disabled
fluentd: disabled
gpu: disabled
helm: disabled
helm3: disabled
ingress: disabled
istio: disabled
jaeger: disabled
knative: disabled
kubeflow: disabled
linkerd: disabled
metallb: disabled
metrics-server: disabled
prometheus: disabled
rbac: disabled
registry: disabled
storage: disabled

4: Enable the standard services

As a real mimimum I can advise to atleast enable the following plugins:

# microk8s enable dns dashboard registry ingress

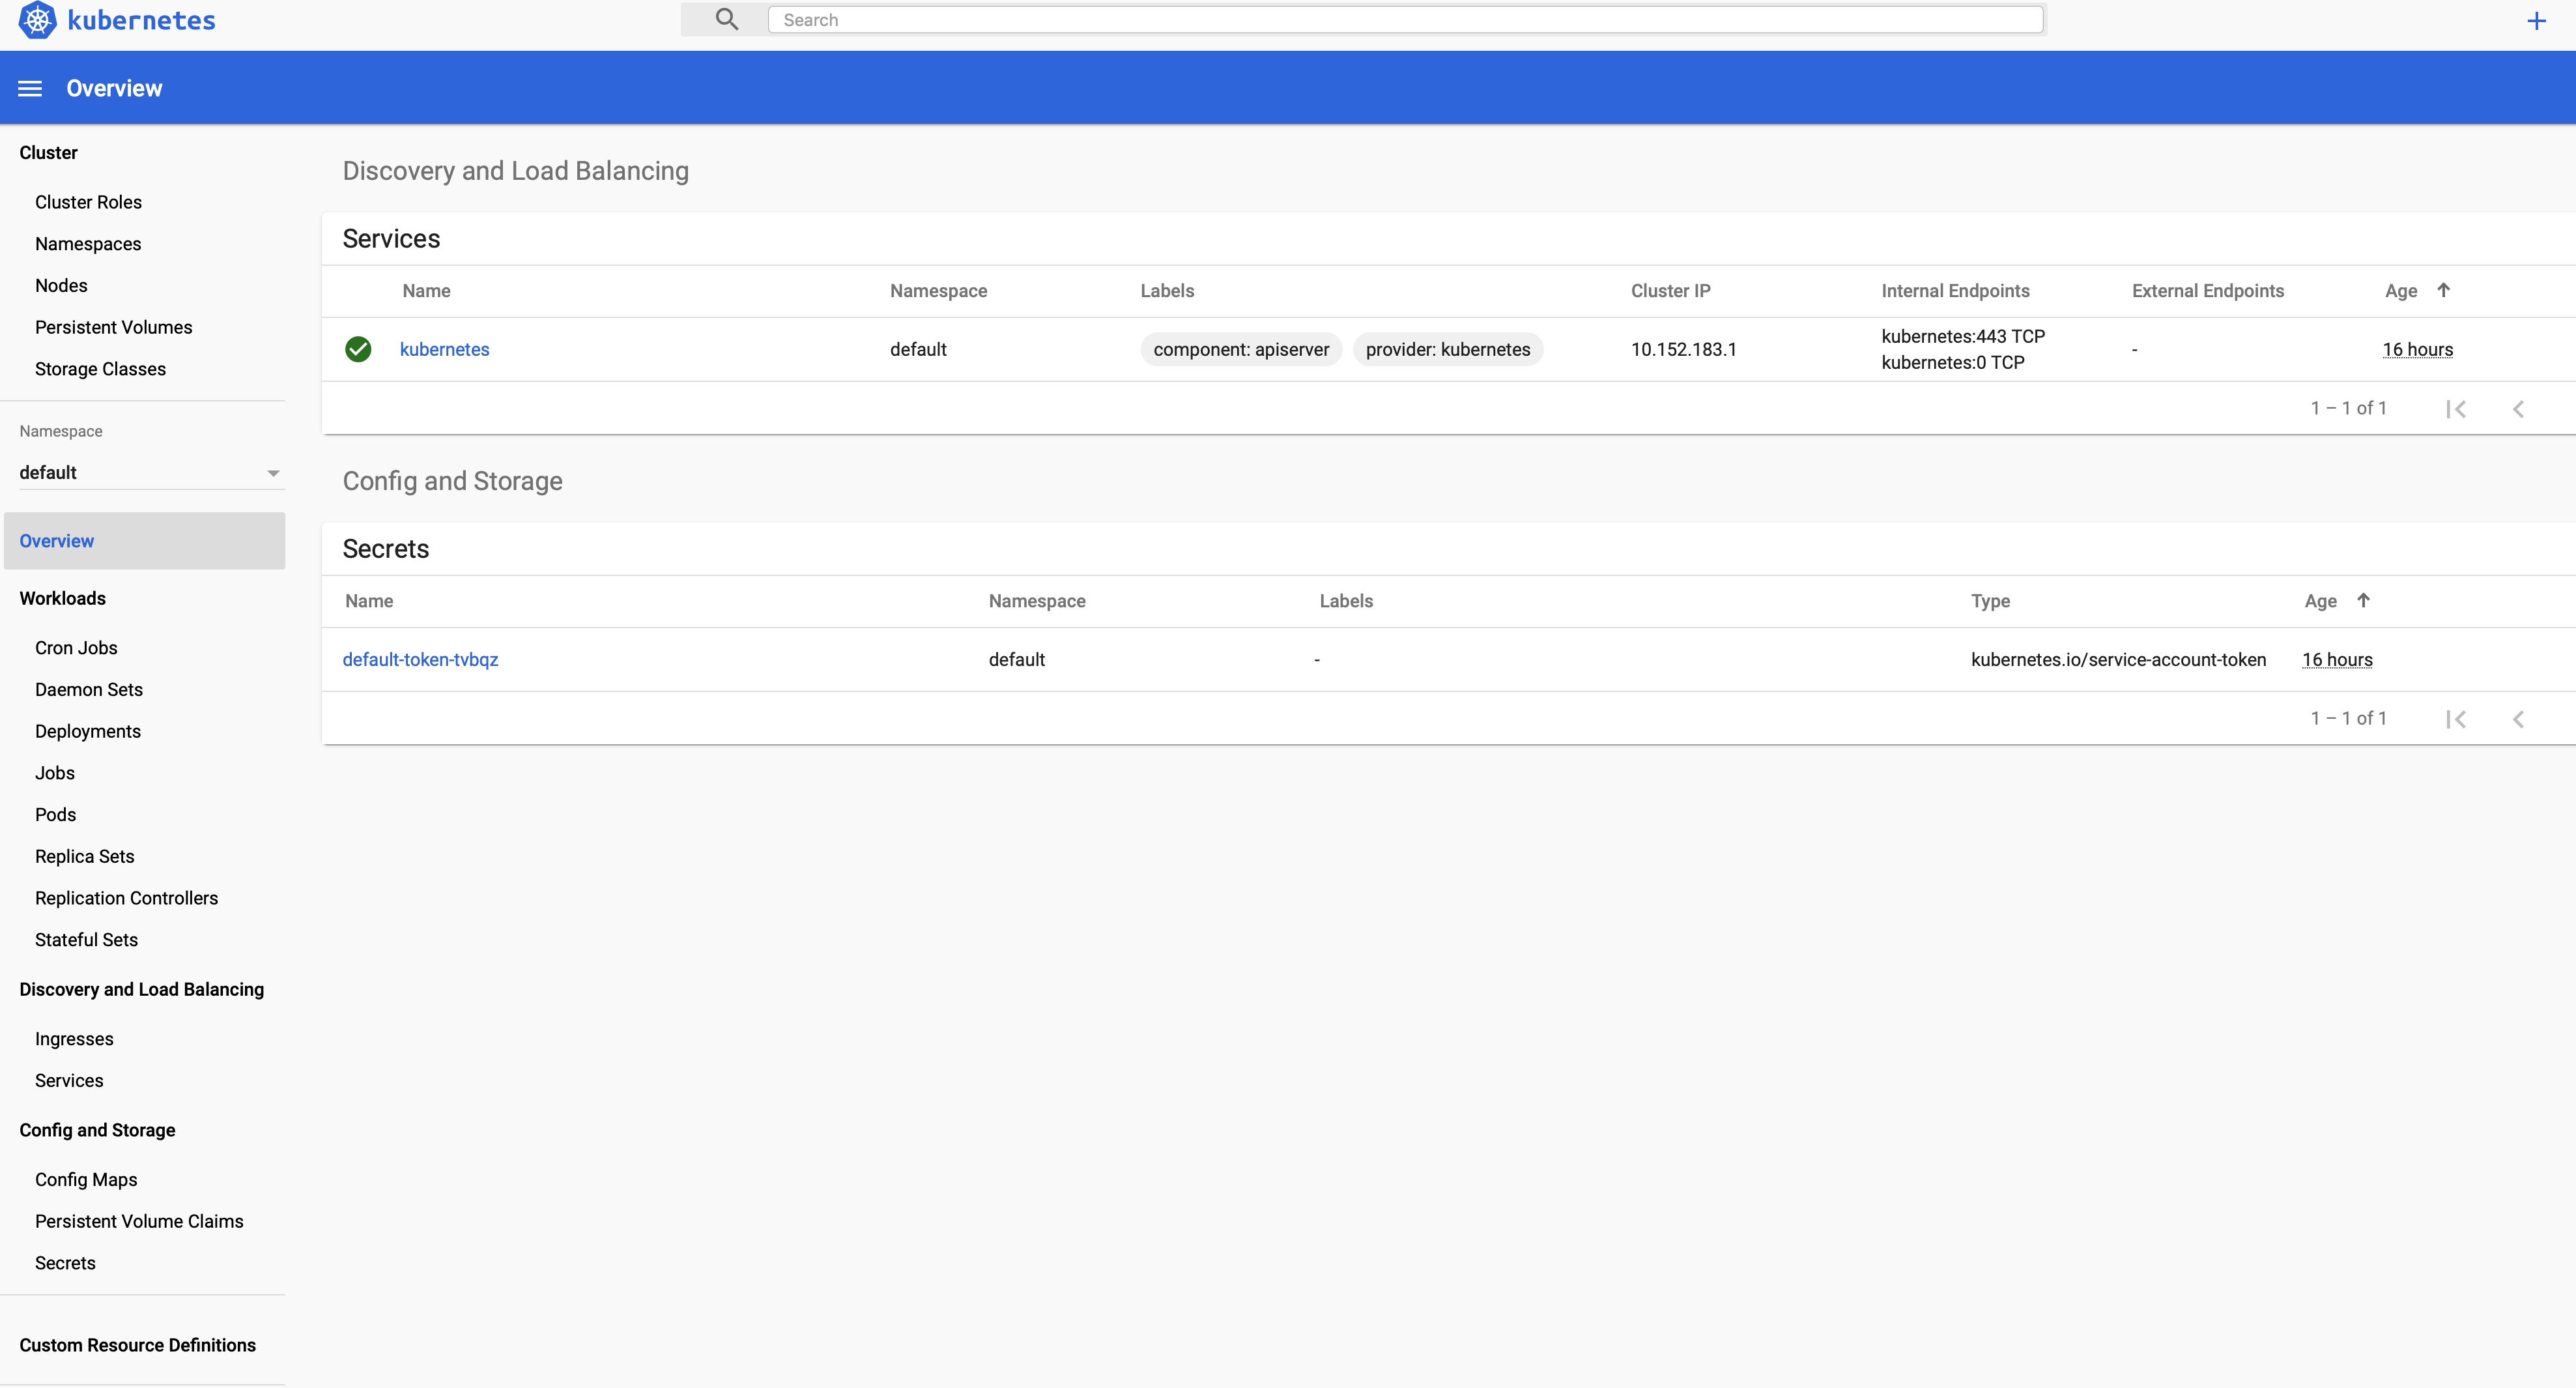
5: Check the dashboard

When you have the dashboard enabled you can do the following:

# kubectl proxy --accept-hosts=.* --address=0.0.0.0 &

And open in a browser: http://{{IPOFTHEMACHINE}}:8001/api/v1/namespaces/kube-system/services/https:kubernetes-dashboard:/proxy/
One the first page with the KubeConfig and Token I just pressed the button skip :)

Screenshot 2020-05-20 at 09.17.54.png

Tips:

You can easily alias kubectl

# sudo snap alias microk8s.kubectl kubectl

Custom Background In Microsoft Teams

Currently at work we use Microsoft Teams and in teams you can set some background. But wouldnt it be nice to use a custom background that you like.

If you have the latest version there should be an option to select a background image. This means custom images can be added.

Windows

Save your image in the Uploads folder below:
C:\Users\<username>\AppData\Roaming\Microsoft\Teams\Backgrounds\Uploads

OSX

/users/<username>/Library/Application Support/Microsoft/Teams/Backgrounds/Uploads

Then, in teams while on a call; click the More Actions (Three Dots) at the bottom, select Show Background Effects
The pictures you added should show up on the right hand side of the screen with the default options from Microsoft.

Visualize markdown documents as mindmaps

I'm a big fan of markdown, as a developer it's quick and easy to write documentation. What I also like to do is create Mind Maps. They are very handy for quickly writing things down that are in your head or to give some guidance in topics.

Recently I found this nice tool markmap-libthat brings both worlds together :)

$ npm i markmap-lib -g

Now create a simple file and save it , like markdown.md :

# FullStack developer

## Programming languages

- [Java](https://www.java.com/)
- [NodeJS](https://nodejs.org/en/)

## Databases

### SQL

- MySQL
- Oracle
- PostgreSQL

---

### NoSQL

- MongoDB
- Redis

## Deployments

- Kubernetes
- OpenShift

One more thing left to do:

$ markmap markdown.md

And it will result in to this awesome html page :) niice..

Getting back up to speed with NodeJS, Part1

Part 1: call, apply and bind

Lately I have been doing some more coding again with NodeJS or maybe better to say Javascript :)

I will be adding some short items about things so that I dont forget and maybe also can help others with explaining what specific functions do.

Today we start with call , apply and bind. To explain the differences I have created some small code which should explain it all in a simple way:

var obj = { num:2 };

var functionName = function(arg1, arg2, arg3){
    return obj.num + arg1 + arg2 + arg3;
};

// call a object with an outside function
console.log('call: ' , functionName.call(obj, 1,2,3));

// call a object with an outside function, same but with an array as arguments
console.log('apply: ', functionName.apply(obj, [1,2,3]));

// call a new object with a merged function inside
var bound = functionName.bind(obj);
console.log('bound: ' , bound(1,2,3));

As you can see, call & apply are almost the same. bound clearly has a different use-case.

Terraform provider for SmartOS machines

A couple of weeks ago I see an email on the smartos emailing list mentioning that John had created a terraform smartos provider for terraform.
Installing the provider is pretty easy. I did the following steps in my smartos zone:
My current go version is: go version go1.10 solaris/amd64

Make sure you have setup go correctly:

# mkdir ~/gopath
# export GOPATH=~/gopath
# go get github.com/john-terrell/terraform-provider-smartos

Lets go to the download directory and compile the source code:

# cd gopath/src/github.com/john-terrell/terraform-provider-smartos
# make build
# ls gopath/bin/terraform-provider-smartos

Now you can use it as a terraform provider. I copied the binary file into the terraform plugin dir:

# cp ~/gopath/bin/terraform-provider-smartos ~/.terraform.d/plugins

You are now good to go to follow the example in the github repo.
Kudos go to John for creating this awesome plugin!

Newer Posts Older Posts